
This compost bin is huge, but I really like it. My old one finally fell apart, so we set up this new one and added in some old compost into the new bin. I started getting compost tea at about 3 weeks. It's a little hard to bring the full compost tea tray up into a position to drain it into another container for use in the garden, so now I drain it sooner and don't spill it.Varmints cannot get into this bin, which is wonderful. I appreciate not needing to turn the compost now that I am getting older, this new bin is much easier on my arms.
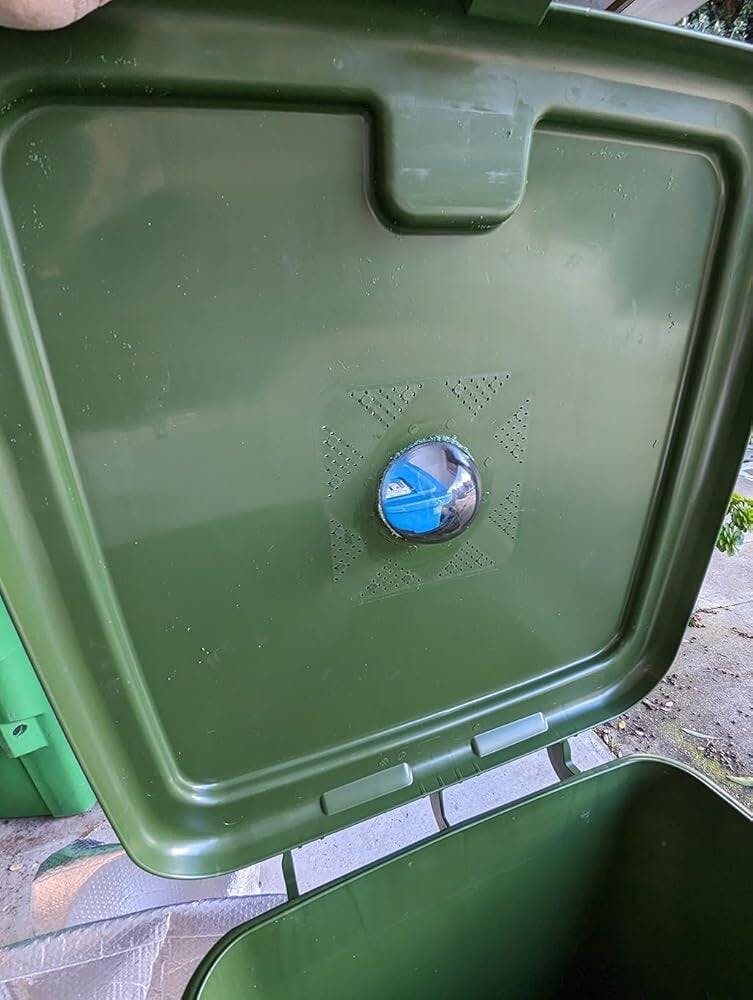
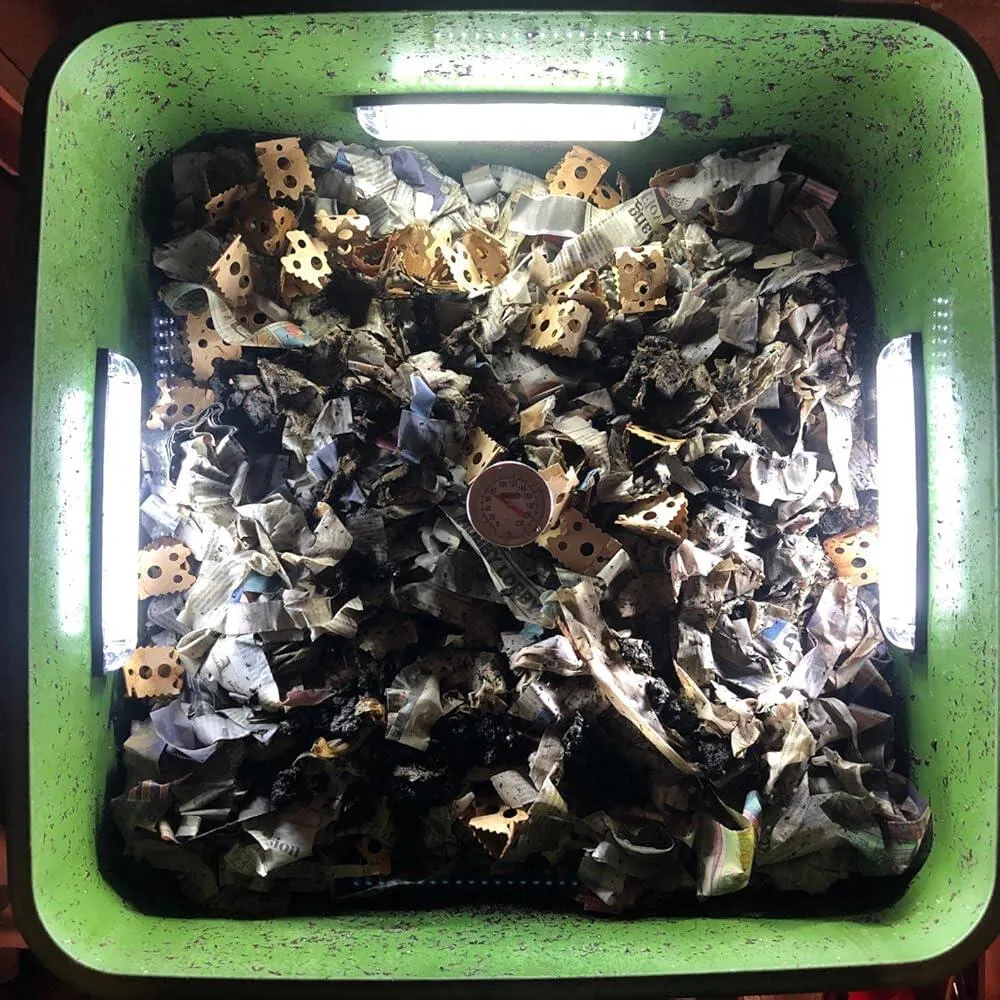
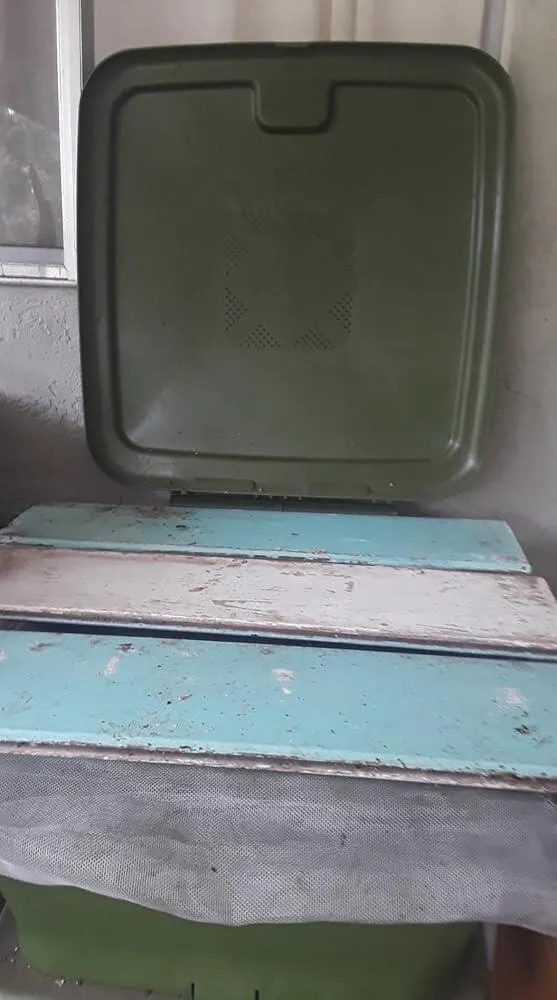
NOTE: photo shows a modification I made to the product to let light into the top. IT IS NOT PART OF THE STANDARD PRODUCT.The extra light keeps worms in the material and discourages them from climbing up sides.Pros: - Easy to set up - Solid construction - Can be easily moved. Which is important because when fill it gets HEAVY. - Been using for 6 months and it's holding up well. Bottom latch works once you learn how to use it. - Continuous feed system works surprisingly well. You can take off the bottom and only SOME finished material falls through.Cons: - Lid is problematic when kept closed: - Worms tend to crawl up sides because it's dark (I experimented with transparent window on top to fix this, but too much moisture STILL an issue) - Too much moisture is retained and can lead to mites. - Internal heat build-up can be an issue. - Worms love to congregate in the bottom, so separating them from the finished castings is a bit of work.Misc recommendations: - Get a cheap "Duel, wired Digital Thermometer" (e.g. B0957XFHCK www.amazon.com/gp/product/B0957XFHCK) put one end into the middle of the bin and make sure the temperature doesn't get too high. If it starts to get a heat spike from decomposition, I use as broom handle to create "columns" all the way to the bottom to allow air to pass through.- I initially modified my bin to add a "window" in the lid using an old security cam dome to allow light in (this keeps the worms from climbing up sides). But I still struggled with too much moisture which lead to compost mites (NOT a health risk but ewww). SOLUTION: just put some screen material (like what is used for a screen window or door) over the top and leave the lid open. Controls the moisture, keeps pests out like fruit flies.- Buy and use Food Grade Diatomaceous Earth. This controls insect pests and does not hurt worms. In fact, it serves as grit to aid in their digestion!- If you use coffee grounds, buy and use Oyster Shell Flour to balance out pH levels. Also serves as grit.- Use a paper shredder to shred cardboard boxes. Just make sure to NOT shred labels or tape. Soak cardboard in water and wring out before using. Worms LOVE pizza boxes.Manufacturer recommendation if they read this:Include some kind of secure screen lid that fits security. It would be used when the lid is open to control moisture. And when the lid is closed, it would just to keep worms better contained.
Be careful not to bump your latches before you harvest your first batch. You might want to consider putting some tape on the latches so you don't accidentally open and spill the entire contents. I had that happen to me prior to putting worms in it. I talked to the Distributor about this problem. How refreshing that he took the time to listen to everything I said and is going to talk to the manufacturer about a suggestion I made for a cheap easy fix. The container is very well built. I look forward to many years of great garden compost.
Out of the gate.. NO PLASTIC JUNK! Everything that is usually wrapped, bagged, secured in plastic, was NOT! Which surprised and then cheered me considerably. The bin seems sturdy and well built. Look at the assembly pictures carefully, but an old lady like me had no problem putting it together. My worms are happily chewing.. it will take some time before castings start accumulating, but so far I'm very pleased.
This will be the third Hungry Bin we've purchased. I have a large family, so we found that we needed a third to handle all the food straps. We balance the green food scraps with browns from cardboard boxes, mowed grass, and dead leaves. In our experience the final castings are very good. Maybe a little on the wet side, but that's not a hugh issue. We store our castings in food grade plastic 5 gallon buckets with some holes drilled in the side around the top under the lid for breathability. Over time they dried nicely. I'm sure you could hurry the drying process if need be, but for our purposes we didn't find it necessary. We start our bins with approximately 1000 red worms each. I'm sure they could hold many more though. These bins are on the expensive side, but they are well worth every penny!
I read all the reviews and I thought I was more clever than all of the reviews. However, I live in the deep south and it is hot here and this worm composter will not work work in the heat. It just traps the heat/ moisture and will not let it go - the worms are struggling to survive and most will die before I figure a way out of this cataclysmic heat expansion home I bought for them. I transferred well over 5,000 worms to the hungry bin and they are just trying to get out any way possible. Lately I have placed frozen water bottles inside the bin to cool it off but it seems after paying $350 for this unit I should not have to do anything let alone try and augment a truly faulty design - for heat dispensation. I have a few good ideas to dispense the heat and I will let you know when I have them in place but once again - should I do the work for the developer - who made this heat making device. I opened it up this morning and the worms were crawling up the sides trying to get out and me there saying NO stay in the heat bin - i felt so guilty. There was so much heat build up inside that it felt like a sauna and no they only thing I have put inside for them to eat is a little coco-coir and some shredded cardboard to soak up all the moisture from the heat/ condensation within the bin. So now I have the lid completely open with a fine mesh screen on top trying to keep all the lizards out because they love eating worms - they are a true delicacy for Lizards. I would send it back but I am in a real tough spot on where to transfer 5,000 worms - If you live in a southern climate please look somewhere else do not make a $350 mistake.
Now that I�m finally at a place in my life where I can grow a garden and start composting, I�m going all in!Since I live in an urban environment and space is at a premium, I bought this taper-design vermicomposter. I had this bin on my wishlist for over a year before I finally bought it. I would recommend the Hungry Bin, but it is definitely pricy and there are other work bins that are much cheaper.Using worms to compost takes up less space than hot composting because you don�t need to make the pile hot to start decomposition (and actually, temps over 95�F are bad for the worms). This bin can process 4.5 lbs of kitchen scraps a day at full capacity, so it can take care of the composting needs of a household.I have a mixture of Red Wigglers and European Nightcrawlers in the Hungry Bin now. The red wiggler worms will stay mostly at the surface and are real composting powerhouses. The substantially bigger European Nightcrawlers, by contrast, live deeper within the soil, forming tunnels with their thick bodies and occasionally moving to the surface for food. The Nightcrawlers really assist with overall compost aeration and decomposition. Plus they�re both great worms to use as live fishing bait!This bin is HEAVY when full. Use caution when moving!Will update review after a few months to see how the worms are doing.
I have struggled with compost piles for years. Between getting the portions of material correct, keeping it hot enough, turning it and keeping rodents out I had all but given up. This worm bin checks all the boxes. It it simple to set up and let the worms do all the work. It is extremely sturdy but easy to move. I have it inside at the moment because of the cold weather and have not noticed any smell.Aside from the great product their customer support is amazing. I had an inquiry and got an immediate reply. This company went above and beyond to make sure I was a happy customer. I love buying products from a company I can trust. I was also pleasantly surprised by the low impact packaging that was used. All the parts fit nicely together in one cardboard box. No tape or plastic to dispose of, the cardboard went right into the garden.I highly recommend this worm farm compost bin, it's simple, effective, and will last forever.
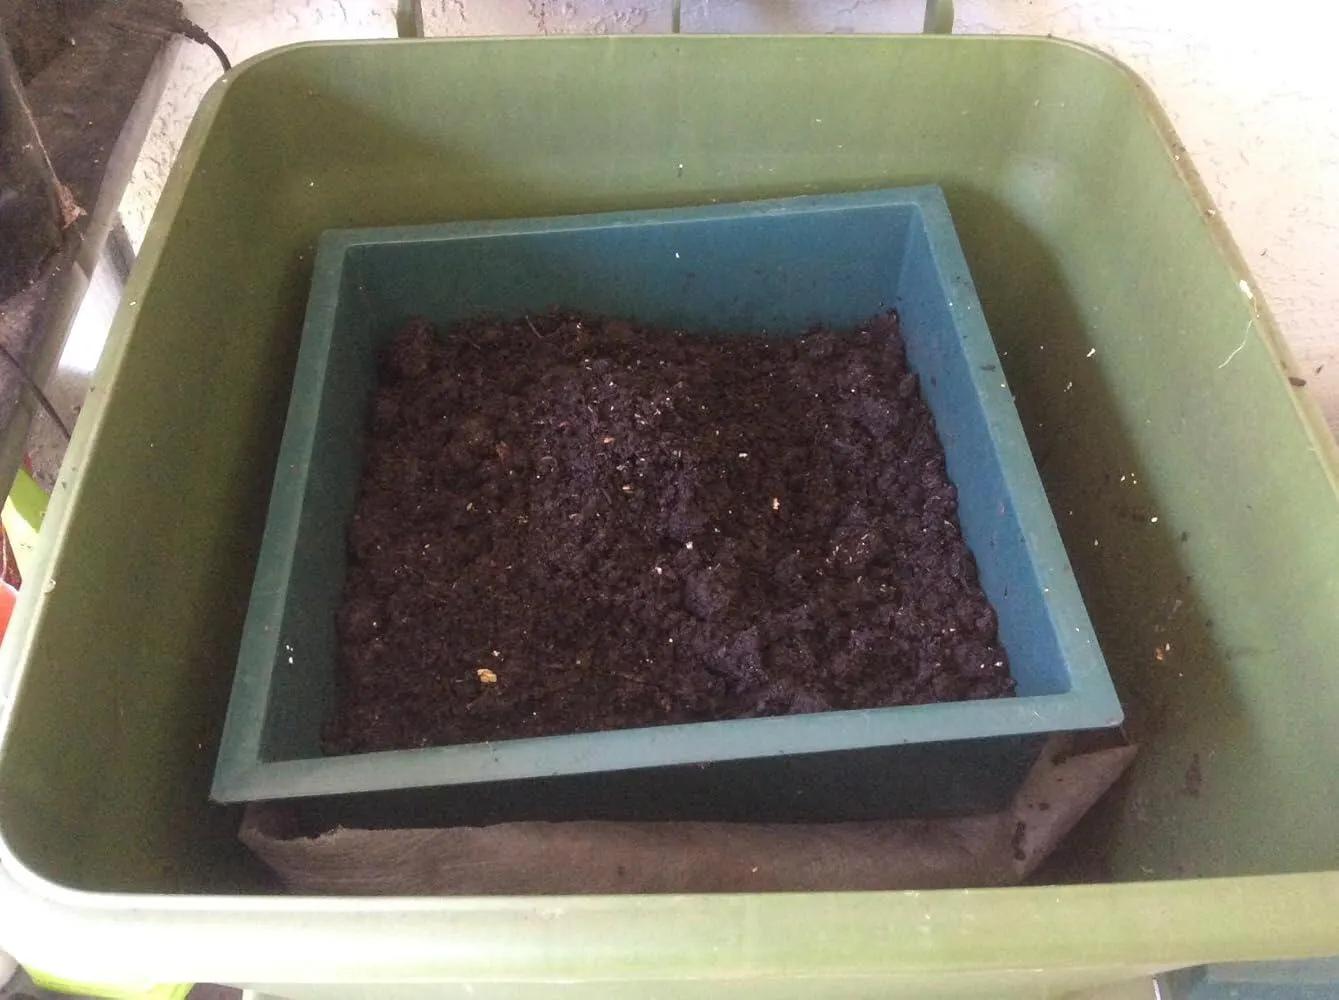
We have had our bin for about 5 months now and it's been a challenge. We seem to be managing the perfect mix of stuff to go into the bin far more than the benefit that it is giving. I would say the best part for us is not the actual worm casings/dirt - because we only get about a pan a month. The best part is the worm tea byproduct. That seems to be much more frequent. If you don't balance the carbon it turns into a fly creation station. There's probably more science to this than the average individual is comfortable with. Not to mention you have to spend $90 on worms to get her started, and if you get it off balance by not adding enough carbon based material, you'll kill them by robbing them of oxygen. Challenging!!
Quality construction and easy to assemble. Like others, I had a lot of escapees but was able to reduce the quantity significantly by placing a battery operated closet light inside the bin. I also suggest you get a thermometer to monitor the internal temp. I live in NC and temps inside the bin spiked to 90F which is way too hot for creature comfort and contributed/caused the escapees. I used the frozen water bottle trick others wrote about and the temps dropped below 80F and everybody seems happy. Right now I�m trying to learn the right combo of moisture, food, light, temp to keep my worms happy but I�m getting there. I don�t really have any complaints about the bin so far but didn�t anticipate being a worm farmer would be so involved but as with any crop it takes trial and error to find what works best for your ecosystem. There is a ton of info on the internet so do your homework before you jump into it. I�ve spent over $500 between the bin, the fill, worms, food, and lights but I think it will be worth it when I take my gardens to the next level. Good luck and I�ll update my post when the compost tea starts to flow and the casting drop.
The media could not be loaded.
Assemble and ready with worms.I put some scrap's, wet leafs and cover with cardboard. They seemed to like it. Still no liquid at the bottom it's been 1 week.At the very top a lot of worm castings. We'll see.Update first yearI knew nothing about having earthworms.I choose this method cause I�m not the sharpest tool in the shed, I thought it�s easy, put garbage, let the worms work and take the worm cast at the end.So far with that I�m good.But I didn�t understand that worms are like a pet, you have to care about them too.Many mistakes(my mistakes) two week heat wave, and winter below 40F. And they still some survive.Basiccheck what they eat.Have dry leaves from autumn.Ground egg shells work wonder's.Moisture regulation by putting fresh scraps around the wall's and a layer of dry leaves on top. My location is inside a garage northeast coastal zone.I been moving the bin a couple times and still is holding.Yes I like it, is not sponsored. But I gladly take a dozen.
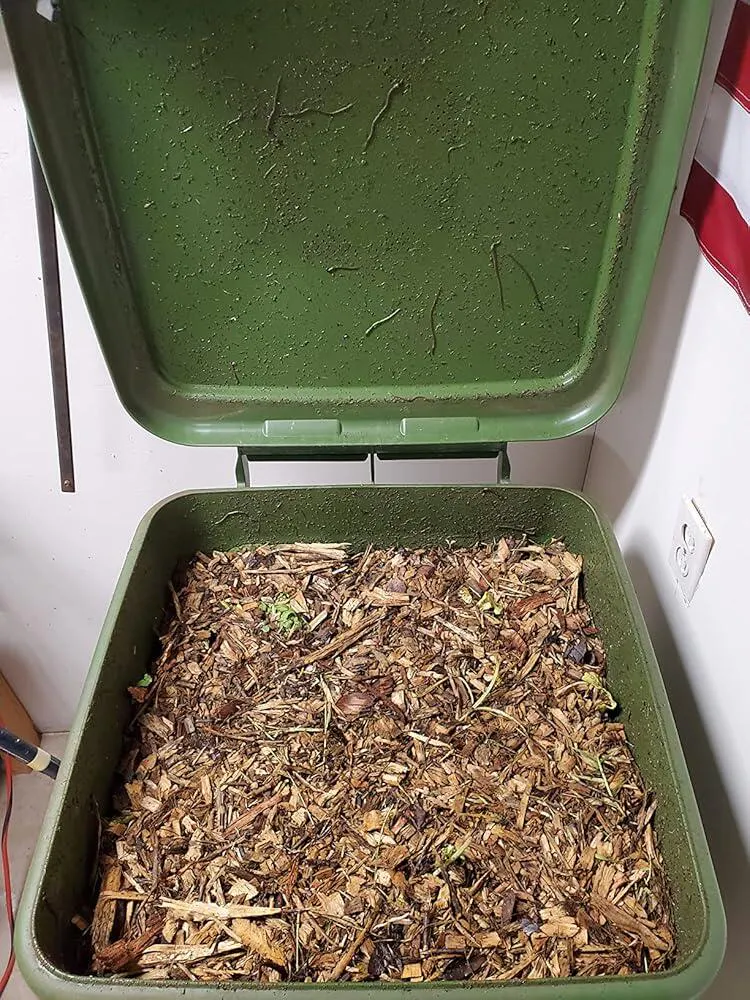
It took me some months to get my system dialed in. Nothing to do with Hungry Bin in that regard. I must say that while moving my bin, while full, the bottom half of the bin detached and everything spilled out, twice. Not too bad of a clean up, but just a forewarning to anyone moving this unit around seasonally. I am in AZ 9b and I have to keep my bin inside during the hot months. Now it has a place in my air conditioned workshop year around, and will not be moved again. The compost stayed at an even 80 degrees all summer while it was 85-90 degrees in the shop.My best method has been to layer the entire top with kitchen scraps and clippings from the gardens and layer on top of that with wood chips/mulch and this thing runs like a charm. No smell. LOTS of Life in my bin. All sorts of insects depending on weather and season. That doesn't bother me really. I find it fascinating. Bugs I've never seen before, and many small types of flies and things. I just figure it adds to the complexity of the final product. I will say that if you are consistent with adding browns as soon as you layer greens, the extra insect population decreases dramatically.My garden loves loves loves the tea and the castings, very potent indeed. When I harvest, it's a nice broken down version of the wood chips and tons of castings, which mixes very nicely with other soils for fresh plantings, seeding/sowing, and fertilizing.If you have a good amount of garden beds and fruit trees 1 bin should do you well. It doesn't take much. Good luck!
Assembly would have gone much more smoothly if we had looked at some videos online first - the instructions are about as helpful as the average IKEA ones (thankfully, we didn't find ourselves with a bewildering amount of screws left over!). So after much cursing, tightening, loosing and doing over, we assembled our composter. We were replacing an old broken one so we just put the older compost (with all its worms) in. Now, instead of having to lift sections off in a two-human job, we can just lift the lid and toss in our compost - what a dream. THAT is my favorite part. This is also on wheels so you can move it easily if you need to (if you live in a colder clime, the worms shouldn't be outside during freezing temperatures). The clever reverse-pyramid design lets the tea and castings flow down smoothly. WE MADE ONE CHANGE, WHICH I WISH THE MANUFACTURER WOULD NOTE. Assembled properly, there is a loose plastic tray that you just set on the ground to catch the tea. Which means if it gets full, you have to bend down and try to lift it out without spilling. This is frankly stupid. We just put a bucket underneath instead and when we get the tea, it's much easier to grab the bucket handle and pull it out (and it's also easier to pour the tea on our plants). It fits perfectly underneath. We've only had it for a month but we already love it. This is definitely the way to go if you don't want your worm composting to include lots of lifting. And it's almost as large as a trash container, meaning you won't have to limit your leftovers. Just please do some research online to see what worms can and cannot eat before you just toss away.
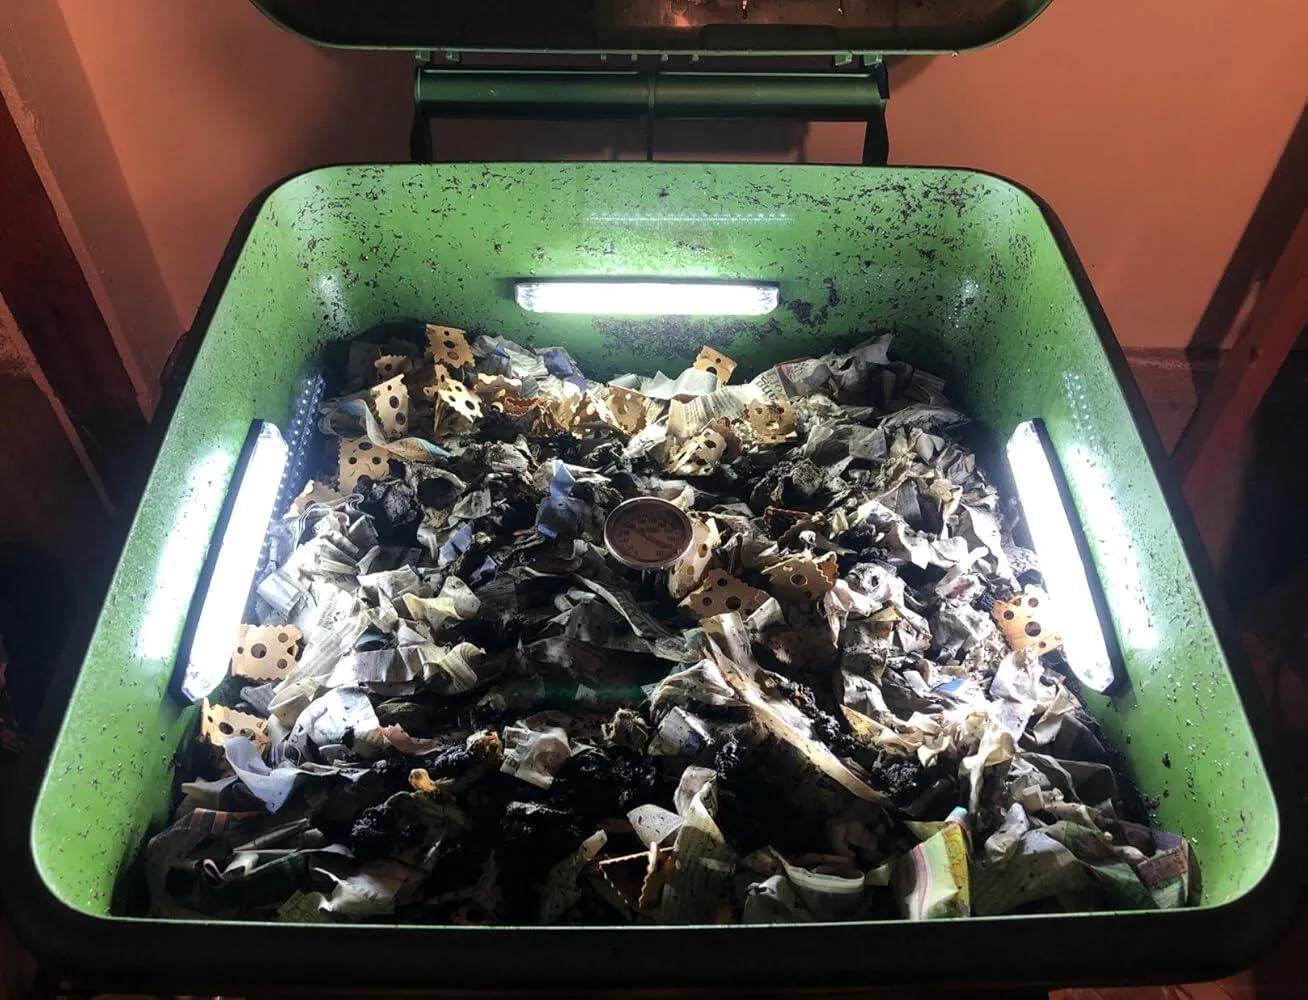
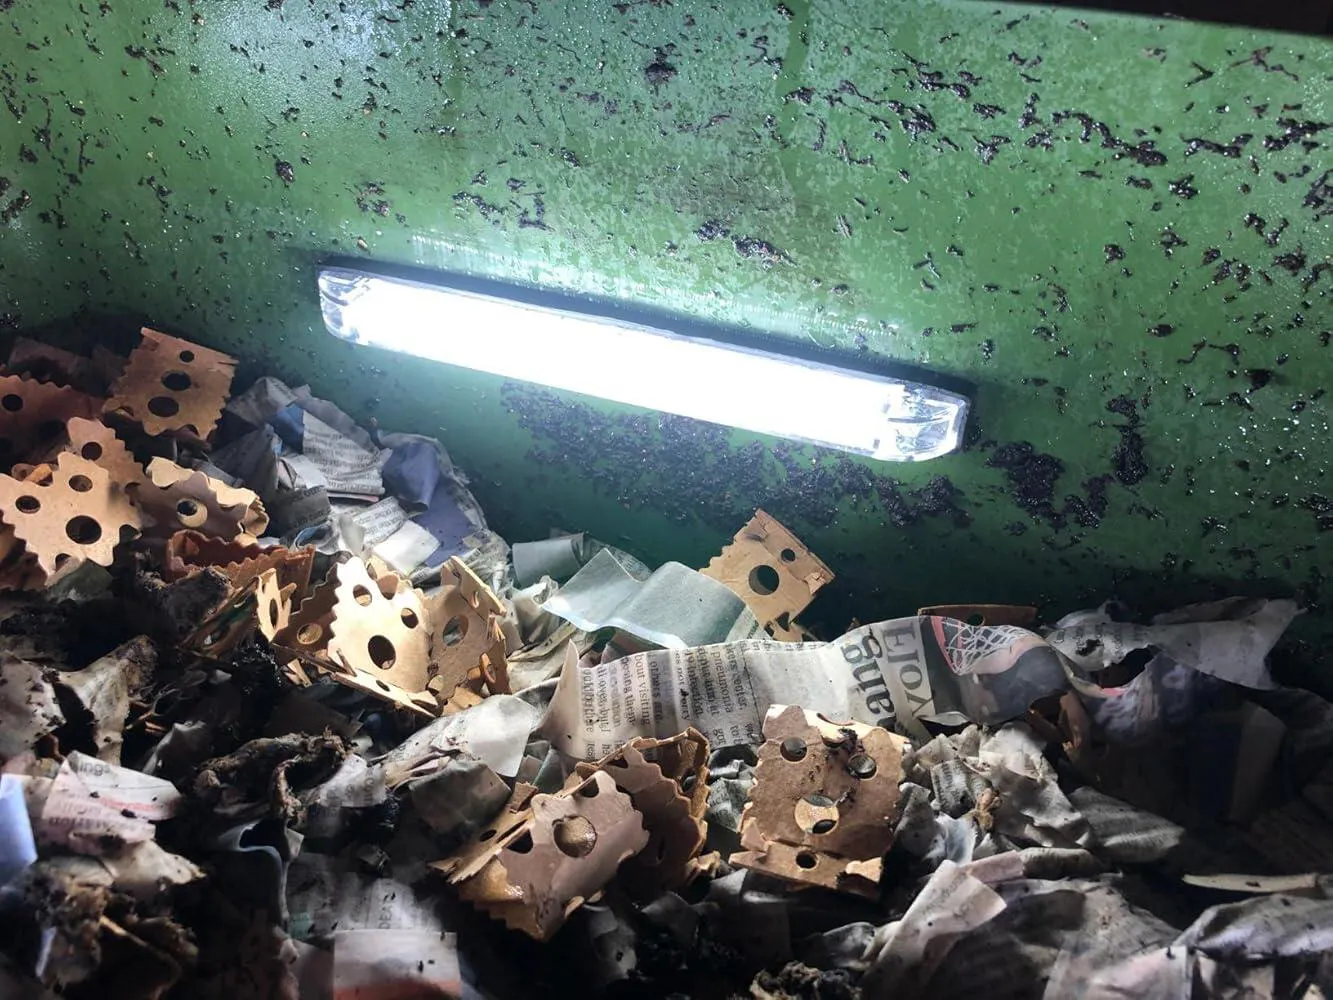
I've had the Hungry Bin for just over 100 days. Just about every time I went to add food, I had to save worms from being crushed by the lid, or from escaping altogether. As the worm population grew, so did the amount of time that went into rescuing the little guys.Knowing that worms generally try to avoid light, I first tried putting in some LED light pucks protected by ziplock bags. The light pucks weren't really a practical long-term solution (needed to switch out / recharge batteries often), but they worked as a proof of concept; the LED lights did deter some of the worms from coming out.Having seen good results with the pucks, I decided to go all in using a set of inexpensive waterproof LED Utility Strips that ran off of 12 volts DC. I wanted to share my hack because it definitely has helped reduce the number of worms. After installing all three light strips, I'm not seeing any worms try to escape!Parts:- Partsam 18 LED Utility Strip -- I started with one LED strip, then added two more after seeing that some worms were still crawling around the walls with just the one strip.- 12V wall adapter, rated for 0.5A that came from an old Cisco router- Mechanical screws, bolts- Small length of electrical wire- Few tools for getting things in place - drill, soldering iron to join the wiresInstallation:1. Measured the amount of power drawn from a single LED strip. That came out to 0.12 Amps / 1.4 Watts.2. The LED strips have a bare set of wires that come out of the back, in the center. I drilled a small hole in the wall of the bin so the wires could come out.3. Each strip also has a pair of holes on either end so you can attach the lights. I drilled a pair of holes for these as well and used mechanical screws and bolts to fix them to the wall.4. Cut / stripped the wire for the adapter. Soldered the lights in parallel so they each received 12V.5. Plugged the adapter in, and am happy to confirm I've yet to see any any worms surface.Am I happy with the results?- Totally. The LED strips don't draw much charge, barely put out any heat, have a nice rubber gasket on the back that helps make the lights waterproof, and finally, installation wasn't too bad.- The lights have a clean look, and actually help me see corners of the bin when I'm burying food / checking up on the little guys.- The wiring around the bin is actually pretty minimal. I thought the whole thing would have a bigger footprint, but I think I'll be able to make things look pretty tidy.- Finally, I think the lights look great. They have a nice, clean look, and the light they give off has just the right amount of brightness and is a nice color, too.Update: Wanted to note that since installing the lights, I�m thinking it might be a good idea to put them closer to the top so that the bin can fill all the way up.
Great product but definitely on the pricey side. I have been vermicomposting for 20+ years and have both store bought and homemade bins. This bin is a great design with it being tapered but there were a couple of issues for me. First I�m not sure there is enough ventilation. You open the lid and there is moisture and worms everywhere under the lid. I didn�t like this so I made a replacement lid out of plywood and very fine screen. I added a cover over the compost to retain moisture and allow the worms to eat at the surface. This allowed for more ventilation and the worms stay in the compost. Second the compost tends to get hung up above the collection pan. After the initial harvest I had to use a broom handle through the top of the bin to loosen up the castings and let them drop to the tray beneath. Not a real big issue but it is worth mentioning if you try to harvest and there is not much in the tray. Note, the second issue may be a result of my solution to the first issue. Maybe with the increased ventilation the compost is dryer and then tends to hang up before dropping in the tray. But I like it better this way and mixing with a broom handle is not a big issue for me. The resultant castings are drier and crumbly, which I like. Overall this is one of the best vermicomposters I own.
I am so very impressed with this Hungry bin! I was serious about using this and didn't want to tinker around with bins that were a pain to use. I even took to heart that if this is your first time out then get something less expensive until you get hang of it. Well I am handicapped so I can't be lifting heavy trays etc. and can't bend down to scoop out worm castings so I went with this which isn't that much more considering the ease of use and saving my back. I ordered a pound of red wigglers and used worm compost that I purchased and mixed it with some potting mix. I had already started a small tote with compost and some worm castings which made a nice starting bed for them. I feed them every other day and cover with shredded computer paper (handy since my husband is a programmer) and keep an eye out for when it they need more of each. They love it and are thriving and it smells so good. I have it in my kitchen because I'm at 6,000 ft. and the temps are still fluctuating. It's clean and tidy and I can't wait until I start getting tea and castings out the bottom which takes up to 60 to 90 days but I expect a little sooner since they started off with a good bed of worm castings.And if Hungry Bin wants to give me a thank you for such a great and honest review I won't complain! LOL But seriously am loving it. No more compost container on my very limited counter space and I get rewarded for owning this Bin.
Ordered mine on Sunday and arrived yesterday and I assembled it today. The parts look and feel very well made. Instructions were easy to follow unless you are like me who likes to jump ahead. I put the latches front and back instead of on the sides so I had to remove the top from the bottom part and the bottom part from the stands. The whole thing is easy to disassemble if you have to. I bought the worms from a local seller and picked up a bag of compost from Home Depot today which I mixed with coir and my compost is up and running. I put it under our covered patio which gets sun in late afternoon. To protect it from the sun and prevent heat build up, I used the box it came in to cover the bin around and the top and bottom loose cardboard went on the lid. I can't wait to harvest my first compost.7/16/2018. Update: It has been four months since I started using my bin. It has been very useful in that it's big enough for the kitchen scrap we have. My worms have multiplied a lot. My only complaint is that when I collect compost that falls underneath, which is mostly the compost that I first put in at the start, there are worms in it. I don't know why. I thought red worms stay only at the top. The way I separate the worms from the compost is to put the compost in one of the composting trays that I have (similar to worm factory) with holes on the bottom. I put a bunch of kitchen scrap on top of the bin and then put the tray on top of that. I keep the lid open to let light in. Since the worms don't like light, the worms in my collected compost go down to the scraps. The collected compost also doesn't have food for them so they go after the scraps underneath the tray. This might be a bit of extra work but it's worth the effort and it's not really a big deal to me.7/20/2018 Update: Just collected today a lot of compost that finally looks like has a lot more worm compost in it than the ones I collected before. I can tell because it has crushed eggshells in it which means it�s the layer with kitchen scraps, not the store bought bagged compost. As you can see, there are worms in it. As I explained in my first update, with light (lid opened) and fresh kitchen scraps underneath the tray, the worms will work their way down. When all the worms are gone, I can use the compost.12/9/2018: This past summer, when it got hot, I relocated the bin under our covered patio where the sun doesn't hit it. When it got really hot, I kept the lid opened for a while and a rat was able to get inside. I think it ate a lot of worms (I read that rats do eat worms) because I noticed that there were less of them. So I took a metal window screen and covered the opening with it and placed a piece of heavy wood 24 inches long by 6 inches wide and one inch thick on front of the opening to make sure a rat doesn't try to go inside. Then I put the lid down. I noticed then that when I removed the wood, some worms were still crawling to the screen and lid. I was thinking that maybe they were trying to escape because they needed more air. When I placed the wood back, no worms were trying to escape. Now my worms are very happy and growing fast that I see clumps of them.7/25/2019 Update: It has been over a year since I bought my Hungry Bin and I'm still loving it. Tried all other compost bins and this is the best. The bin has so many worms that they crawl all the way down to the collection tray. I remove them by exposing them in the light forcing them to crawl on the bottom of the pile and then scrape off the top which is free of worms. The collected worms go back in the pile. I stopped using the tray to separate the worms (I sold my vermihut). I still put a metal screen on the opening to give the worms ventilation and put the lid partway down. When it's too hot, I keep the door all the way up and placed boards on top (with gaps in between) to keep rodents from lifting up the screen. To keep the compost odorless, I keep a balance mix of green and brown waste by mixing in some dry brown leaves once in a while.
I've had this for about a year and a half now. It works very well. I definitely would not have the ambition to deal with a tray type vermicomposter that required swapping things around.I keep my Hungry Bin outside (in the shade under a deck). The biggest drawback to that was that somehow the Black Soldier Flies (aka fat little maggots) did somehow make their way in when I only used the plastic top. I've found that a couple sheet layer of newspaper under the top works well to minimize that infiltration (and seems to keep the worms happier in all types of weather).The Hungry Bin does not smell at all and keeps up with the kitchen scraps (FYI we are big juicers in our household) just fine. I also have an envirocycle composter that I use for the random garden detritus (that is not a 5 star product IMO, but it does work okay as a convenient and attractive dump for garden waste inside the garden fence -- set up on top of 4 cinder blocks to drain the liquid directly into a container underneath).A useful tip if you are keeping the Hungry Bin outside (recommended, IMO, there are a variety of critters that seem to be in this worm-centered ecosystem) is to get a grill cover, shop light with an incandescent bulb, and a thermal switch to kick in when below freezing (and the shipping box opened up as a "winter coat" if you still have it). A 60w bulb gave me about a 20 degree bump in temperature -- i.e. good to 12 degree outside temp, a 100w about 32 degrees -- good to a 0 degree outside temp). The first winter I did this and it all worked just fine. This past winter I had a lot of other stuff going on and I got lazy (partly an experiment...) but I did not hook up the shop light. It was well-below freezing for over a month and the worms did NOT survive.The worms are restocked now and doing just fine again. Hungry Bin is a good, easy solution for not wasting valuable organic kitchen waste in my experience.
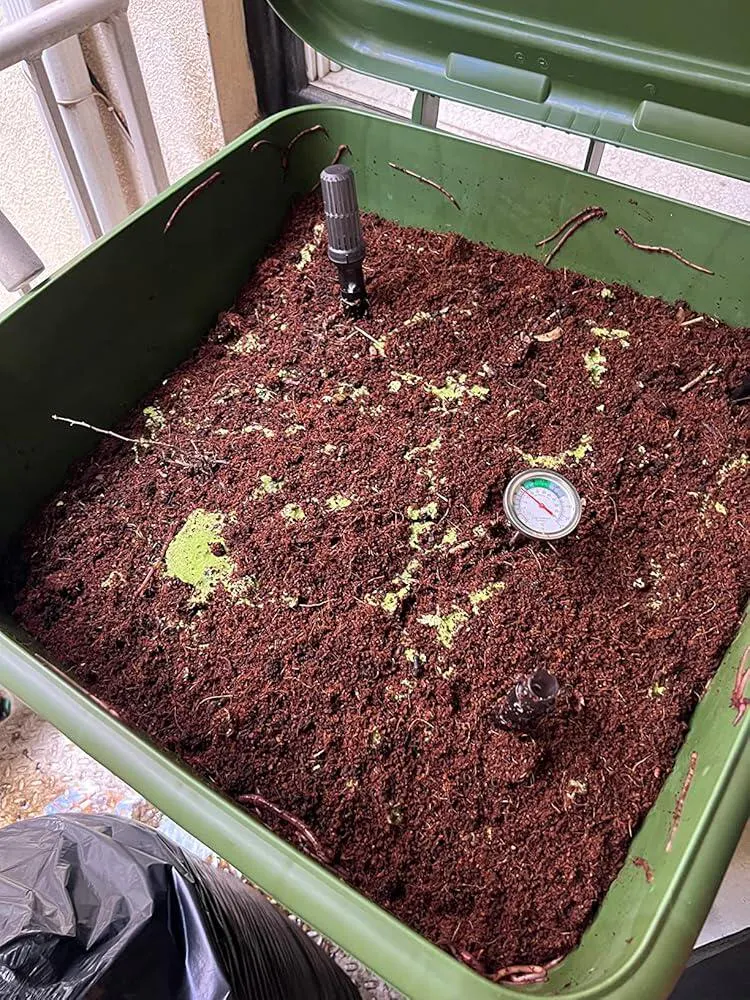
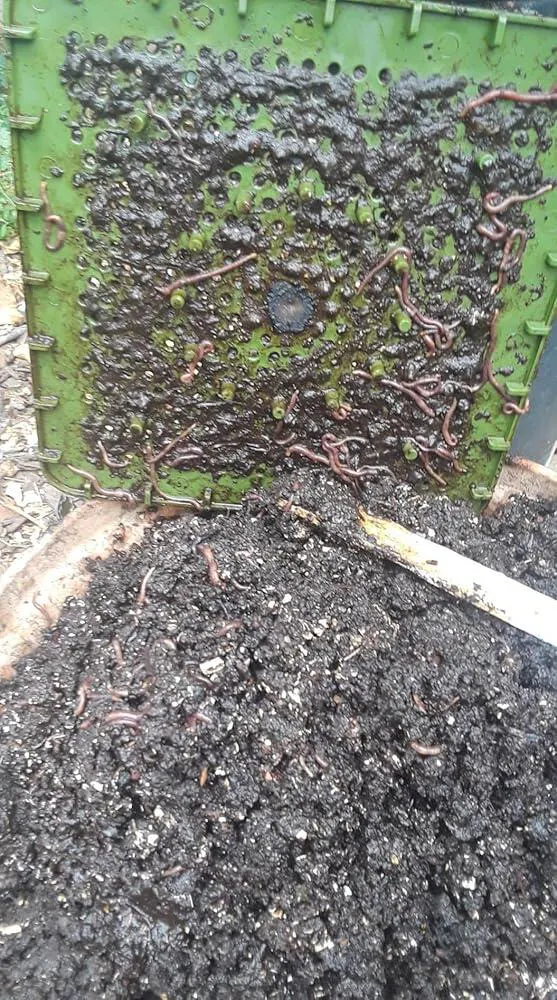
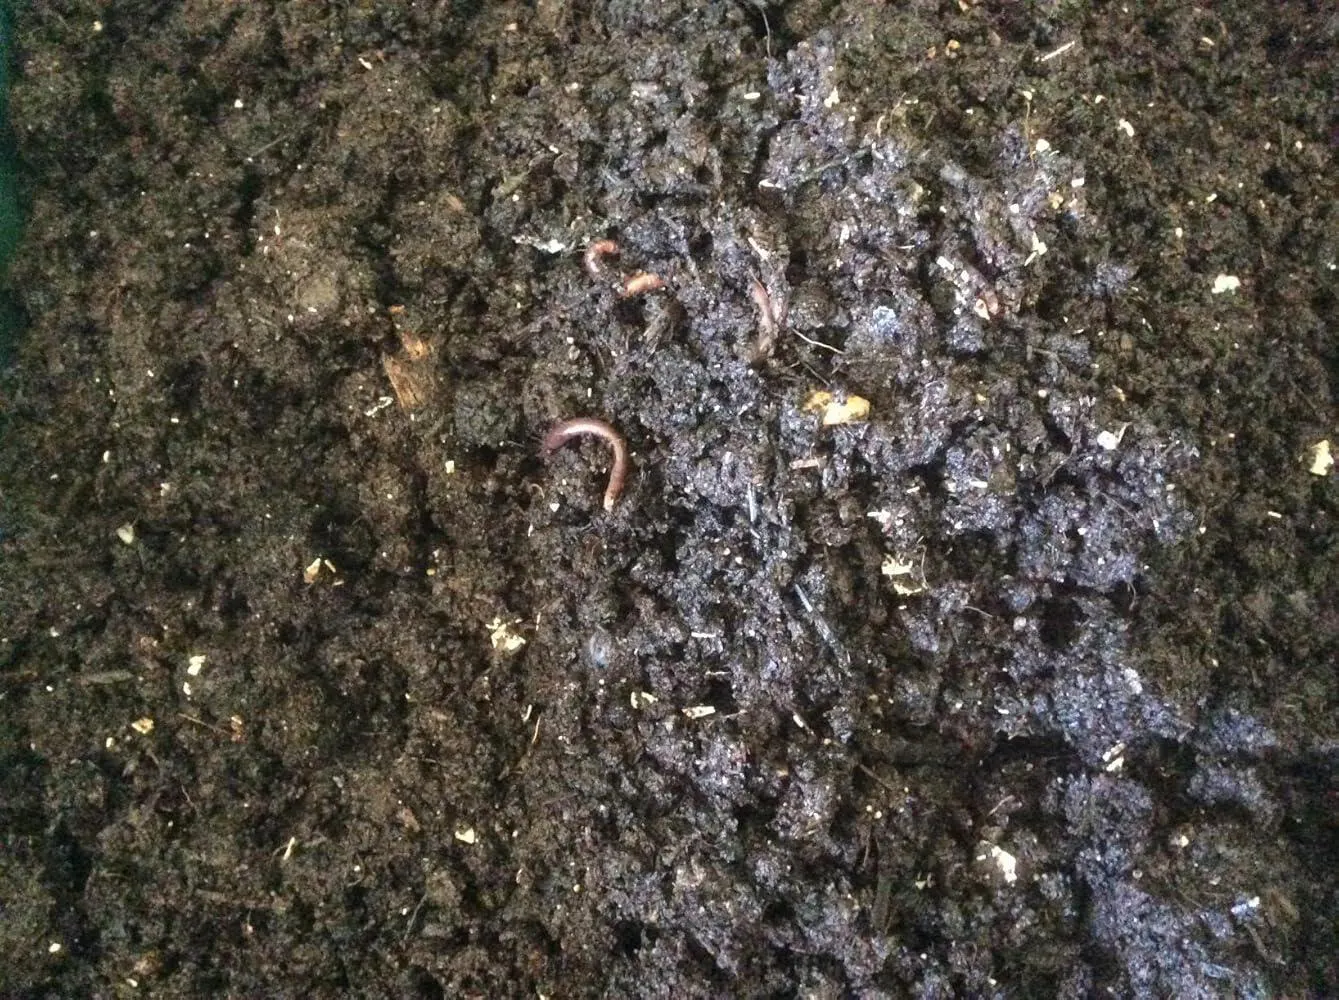
I bought my Hungry Bin in December/2016 when I was totally new to vermi-composting and didn�t know a thing about it. What sold me on the Hungry Bin was the flow-through concept and its clever design with these benefits: no lifting of heavy trays and no sorting out worms from the castings.This is now June/2017 and having used my Hungry Bin for six months, I still think the Hungry Bin is the best residential-scale commercial worm bin on the market, but this doesn�t mean it�s perfect. The bin�s design does have some flaws that I will point out below.I live in a family of two and after six months of putting almost all kitchen scraps in the Hungry Bin I STILL have not harvested any worm castings yet because my family of two simply does not produce that much kitchen scraps. I have four small parrots and they help out with producing scraps by their leftover seeds, hulls, and some fruits. The bin is not to blame for this slow progress, of course. It just takes a long time to fill the bin because kitchen scraps such as fruits and vegetables are mostly liquid and shrink significantly in volume once they are digested by the worms. The instructions mention that harvesting should be done only when the contents are about 1� from the top. This is to ensure that the castings in the bottom are properly compacted and not fall out in a big slide when the bottom tray is removed during harvest.The bin came in box measuring about 26"L x 24"W x 18"H. When empty, it's very lightweight (about 28 lbs) and took about half an hour to assemble.I keep my worm bin in the garage because it�s the only place at my home that can provide the worms a temperate environment year-round. The worms can survive any cold temperature in my non-heated but insulated garage, where the ambient temperature only goes down to 55 F in winter. I found in my case the biggest problem has not been the cold but the heat and the occasional high temperature resulting from the decomposition of organic materials.I have found there are two major problems with the Hungry Bin:1. The biggest problem I have experienced with the Hungry Bin is that certain foodstuffs, especially grain-based foodstuffs, will decompose and heat up the bin very quickly within a day or two of being dumped into the bin. The heat from decomposition can, and will, kill the worms very quickly. What little ventilation the lid does provide is done through 168 tiny holes (approximately 3/32� diameter) on the lid. The problem that the holes do not provide adequate ventilation when there is even a small amount of heat generation from the decomposition. This is especially true when the tiny 3/32� holes are frequently plugged up by condensation and red and white mites migrating to the top and clogging up the holes. The mites move fast, so let�s say I cleared the holes of mites and moisture in the morning. By the evening, the holes could get clogged up again.One way to prevent heat buildup is not to use the stock lid whenever a large quantity of grain-based stuff is added to the worm bin and instead cover the bin with a piece of airy dark cloth or a piece of plywood or pegboard with NUMEROUS 1/8� holes. You�ll have to mist the compost surface at least once a day to make up for the evaporation through the airy cloth or pegboard.One time I added half a pound of waste buckwheat flour to the bin and mixed it into the top 1� of the vermi-compost and didn�t notice the temperature spiked up within the next couple of days until I saw the worms trying to escape. My experience showed me that the worms (and also the mites) will BEGIN to look for an exit out of the worm bin when the surface layer of the compost hits around 77 to 80 degrees F. The worms (again also the mites) will try to flee en masse (see attached picture) when the top compost layer hits around 85F and the worms will begin to die off at around 90F when they are trapped and can�t get out of the bin. Luckily, I caught the heat buildup in time before the worms began to die. An infrared thermometer and worm bin thermometer are very helpful to help monitor the temperature.The mites are a part of the worm bin eco-system. I have been unable to get rid of them, but they don�t seem to harm the worms. The only problem with the mites seems to be that they compete for food with the worms, but no real harm is done to the worms by the mites except that they plug up the ventilation holes.2. The second problem I experienced with the bin is that the lid is not tight enough to keep the worms from escaping. My concrete garage floor is littered with tens and tens of dried up worms that once tried to escape the bin because of the heat. Lining the top interior edge with Corry�s Slug & Snail copper tape barrier can be very effective in keeping the worms from escaping. As soon as the worms� mouths touch the copper, they retreat. The copper�s effectiveness diminishes greatly once it becomes heavily oxidized over several months. The real solution ...
I know how important it is to the environment to compost food scraps, but until now the whole process of handling them for pickup at the end of each week has been smelly and icky with the food decaying all week long waiting to be picked up by the city garbage service.It�s been three weeks now since I set up the Hungry Bin and it is awesome. The bin and separate package of worms arrived in a couple days. The bin itself was packaged as nicely as any Apple product. It was easy to assemble and fun to put the squiggly live worms into it. After a few days, I could visibly see the worms growing as they gobbled up the food scraps.The best part though is how easy and clean the process of getting rid of table scraps is. Each day, we dump a bowl full of scraps that accumulate in the kitchen into the Hungry Bin. The scraps haven�t started stinking, the bowl gets washed nightly just like any other dishes, and every time I open the Hungry Bin lid, there is no unpleasant odor. It�s just so cool how organic soil nutrients seemingly magically accumulate in the two trays. It�s all so well designed and easy to use. Good on ya� folks at Hungry Bin.
